This is default featured slide 1 title

Go to Blogger edit html and find these sentences.Now replace these sentences with your own descriptions.

This is default featured slide 2 title

Go to Blogger edit html and find these sentences.Now replace these sentences with your own descriptions.

This is default featured slide 3 title

Go to Blogger edit html and find these sentences.Now replace these sentences with your own descriptions.

This is default featured slide 4 title

Go to Blogger edit html and find these sentences.Now replace these sentences with your own descriptions.

This is default featured slide 5 title

Go to Blogger edit html and find these sentences.Now replace these sentences with your own descriptions.

Sunday, May 5, 2013

Samsung Galaxy S4 LTE GT-I9505 on XXUAMD2 Firmware ကို Root မယ္

မဂၤလာပါ ခုေဖာ္ျပေပးမဲ့ root လုပ္နည္းေလးကေတာ့ S4 GT-I9505 XXUAMD2  ကို root လုပ္မဲ့နည္းေလးပါ။  မိမိ firmware နဲ႕
 ကိုညီမွ လုပ္ပါလို႕ ေျပာပါရေစ။ ေသခ်ာတယ္ဆိုရင္ေတာ့ ဖုန္းကို usb debug နဲ႕႔ unknow sources on ၿပီးပါ၀ါပိတ္လိုက္ပါ။ download mode ၀င္ပါ့မယ္ vol down + home + power  3,4 စကၠန္႕ေလာက္ဖိထားလိုက္ပါ။ တတ္လာၿပီဆိုရင္ vol up တစ္ခ်က္ႏွိပ္ေပးလိုက္ပါ။ ၿပီးရင္ ဆက္ၾကမယ္ေနာ္
 လိုအပ္တာေလးေတြ ေဒါင္းထားလိုက္ႀကပါ။

Driver
>> Download <<
Odin
>> Download <<
CF-Auto Root
>> Download <<
အားလံုးေဒါင္းၿပီးသြားရင္ driver ကို install လုပ္လိုက္ပါ။ ၿပီးရင္ odin ကို run ပါ။ ဖုန္းကို Download mode နဲ႕ ကြန္ပ်ဴတာနဲ႕႔ခ်ိတ္ပါ။ ID:COM မွာ အေရာင္ေလးလင္းသြားရင္ ဖုန္းနဲ႔ကြန္ပ်ဴတာ သိပါၿပီ။ PDA မွာ ေဒါင္းထားတဲ့ ဖိုင္ေလးထဲက CF-Auto-Root-gti9505.tar.md5 
ကိုထည့္ေပးပါ။ re partaion ကို အမွတ္မျခစ္ပါနဲ႕႔။ ၿပီးရင္ odin က start ကိုသာႏွိပ္လိုက္ပါ။ PASS ေလးေပၚလာရင္ၿပီးပါၿပီ ဖုန္းက reboot က်ၿပီး ျပန္တတ္လာရင္ၿပီးပါၿပီးခင္ဗ်ာ။
ေနာက္တစ္ခုေျပာခ်င္တာက firmware မတူလို႕႔ စိတ္ညစ္ေနတဲ့သူငယ္ခ်င္းမ်ားအတြက္ ေနာက္တစ္နည္းရွိပါတယ္ အဲဒါေလးကေတာ့ bat ဖိုင္ေလးပါ။ GT-I9505 အတြက္ပါ fimware ဘာျဖစ္ျဖစ္ရပါတယ္လို႕ေရးထားပါတယ္။ စမ္းသပ္ခ်င္တဲ့ သူငယ္ခ်င္းအတြက္ ေအာက္မွာ ဖိုင္ေလး ကိုတင္ေပးထားပါတယ္။ usb debug နဲ႕႔ unknow resources ကို on ၿပီး ကြန္ပ်ဴတာနဲ႕ခ်ိတ္ပါ။ ၿပီးရင္ေတာ့ bat ဖုိင္ေလးကို run ေပးလိုက္ပါ။
>> Download <<

Mutual Friend (ျပည္) from

Lenovo Tab A2207A-H ကို Firmware ျပန္တင္ၾကမယ္

ခုေဖာ္ျပမဲ့နည္းလမ္းေလးကေတာ့ lenovo tab A2207A-H ကို firmware ျပန္တင္ႏိုင္မဲ့ နည္းလမ္းေလးပါျဖစ္ပါတယ္။ တင္နည္းေလးကေတာ့ မခက္ပါဘူး ဒါေပမဲ့ အျခားအလံုးေတြ နဲ႕ မတူပဲ နည္းနည္းေလး ကြဲျပားပါတယ္။ အထိက အေနနဲ႕ကေတာ့ firmware ရရွိဖို႕ နဲနဲခက္တာပါ။ ကြန္ေတာ္ကိုယ္တိုင္ေတာ္ေတာ္ ေလး ရြာလည္ၿပီးမွ ေဒါင္းလို႕ရသြားတာပါ ။ သူငယ္ခ်င္းမ်ားအတြက္ကေတာ့ ေဒါင္းလို႕ တန္းရႏိုင္မဲ့ လင့္ေလးကိုထည့္ေပးမွာပါ။ အရင္ဆံုး firmware ေလးကို ေဒါင္းလုပ္ လုပ္ထားလိုက္ပါခင္ဗ်ာ။

A2207A-H Firmware
>> Download <<
ေဒါင္းလုပ္ၿပီးသြားလို႕ firmware zip ဖိုင္ကို password ေတာင္းရင္ေတာ့ Password: bbs.lenovomobile.com ပါခင္ဗ်ာ။ ဒါေပမဲ့ ကၽြန္ေတာ္တင္ေပးထားတဲ့ firmware က password မပါပါဘူးခင္ဗ်ာ။
ၿပီးရင္လိုအပ္မဲ့ Flash Tool နဲ႕ Driver ေတြကို ေဒါငး္ပါ့မယ္ခင္ဗ်ာ။
Flash Tool
>> Download <<
USB VCOM Driver MTK6516 Driver
>> Download <<
LePhone Driver
>> Download <<
အာလံုးေဒါင္းလုပ္ဆြဲၿပီးသြားရင္ေတာ့ Firmware တင္ဖို႕ လုပ္ၾကမယ္ခင္ဗ်ာ။
firmware ဖိုင္ကို zip ျဖည္လုိက္ရင္ အထဲမွာ သံုးဖိုင္ပါ ပါတယ္ ။ အဲဒီသံုးဖိုင္လံုးကို extrect file ေနနဲ႕ျဖည္ထားပါ။
 အရင္ဆံုး ကြန္ပ်ဴကို Driver အရင္သြင္းပါ့မယ္ Tab ကို ပါ၀ါဖြင့္ထားၿပီး ေနာက္က အဖုံးေလးကို ခြာထားပါ။ 
ၿပီးရင္ အ၀ိုင္းေလးအလည္က reset ေလးကို ထိုးေပးၿပီးကြန္ပ်ဴတာနဲ႕ခ်ိတ္ပါ။ အရင္ဆံုး mtk 6516driver ကို install လုပ္ပါ။ ၿပီးရင္ ႀကိဳးကိုျပန္ျဖဳတ္လုိက္ပါ။ၿပီးရင္ Vol up ကိုဖိထားၿပီး  ျပန္တပ္ပါ။ USB VCOM Driver MTK6516 Driver install လုပ္ပါ။ အဲဒါေတြ လုပ္ၾကည့္လို႕မွ အဆင္မေျပဘူးဆိုရင္ေတာ့
LePhone driver  ကို Install လုပ္ပါ။ Driver install လုပ္တာေအာင္ျမင္သြားၿပီဆိုရင္ေတာ့ firmware တင္ဖို႕ ျပင္ဆင္ပါ့မယ္။ Flash Tool ကို run လိုက္ပါ။ scatter-loading ဆိုတာေလးကိုႏွိပ္ၿပီး firware သံုးဖိုင္ထဲက target_bin_fat ထဲကtarget_bin ဖိုဒါထဲက MT6577_Android_scatter_emmc.txt ကိုေရြးေပးလိုက္ပါ။ၿပီးရင္ Flash Tool ရဲ႕ ေပၚနားေလးက DA DL ALL With Check Sum ဆိုတဲ့အမွတ္ေလးကို ျခစ္ေပးထားပါ။ ၿပီးရင္ေတာ့ fimware->Upgrade ဆိုတာေလးကို ႏွိပ္ပါ ၿပီးရင္ tab ကို ကြန္ပ်ဴတာနဲ႕ခ်ိတ္ေပးလိုက္ပါ။

firware ကိုမွန္မမွန္စစ္သြားပါလိမ့္မယ္ ၿပီးရင္ ဆက္မတင္ေတာ့ပဲရပ္ေနပါလိမ့္မယ္ မစိုးရိမ္ပါနဲ႕ ကြန္ပ်ဴတာနဲ႕ခ်ိတ္ထားတဲ့ႀကိဳးကို မျဖဳတ္ပဲ Driver သြင္း စဥ္က ထိုးခဲ့တဲ့ reset အ၀ိုင္းေလးကို ထပ္ၿပီး ထိုးေပးလိုက္ပါ။ သူဖာသာတင္သြားပါလိမ့္မယ္ အနည္းငယ္ေတာ့ ၾကာပါတယ္ ခင္ဗ်ာ သီးခံၿပီး ေစာင့္ေပးပါလိို႕ ေျပာပါရေစ ။ ၅ မိနစ္ေလာက္ေပါ့ အားလံုးၿပီးသြားရင္ေတာ့ အ၀ိုင္းေလးက စိမ္းသြားရင္ flash tool ကိုပိတ္ၿပီး ႀကိဳးျဖဳတ္လိုက္ပါ။ tab ကို ပါ၀ါဖြင့္ေပးလိုက္ပါ။


အားလံုး အိုေကသြားပါလိမ့္မယ္ ပထမဆံုး အႀကိ္မ္ firmware ျပန္တတ္တာ ၾကာပါတယ္ သီးခံၿပီး ေစာင့္ေပးဖို႕ေတာ့လိုပါတယ္ ခင္ဗ်ာ။ သူငယ္ငယ္ခ်င္းအားလံုး စိတ္ခ်လက္ခ် တင္ၾကည့္ပါခင္ဗ်ာ ကၽြန္ေတာ္ ကိုယ္တိုင္ ႏွစ္လံုး တင္ၾကည့္ၿပီးလို႕ ျပန္လည္မွ်ေ၀ေပးတာျဖစ္ပါတယ္ခင္ဗ်ာ ။ ဒီေလာက္ဆိုရင္ေတာ့ သူငယ္ခ်င္းအားလံုးအဆင္ေျပၾကလိမ့္မယ္လို႕ေမွ်ာ္လင့္ပါတယ္ ။ သူငယ္ခ်င္းအားလံုး ေပ်ာ္ရြင္ပါေစ။
 

Android Root Tools

Android Phone ေတာ္ေတာ္မ်ားမ်ားကို Root လုပ္ေပးႏိုင္တဲ့ OneClickRoot(China)Software ေလးပါ။ Super One Click မဟုတ္ပါဘူး။ ဒီ Software ေလးကစိတ္ခ်ရၿပီး လြယ္လဲလြယ္ပါတယ္။
(2) Phone မွာ USB Debugging လုပ္ၿပီး Computer နဲ႔ခ်ိတ္ပါ။
(3) ရလာတဲ့ Software ေလးကို Run ပါ။
(4) ဘယ္ဘက္ေအာက္ေဒါင့္က Box ေလးကို Check လုပ္ပါ။
(5) ညာဘက္ေအာက္ေထာင့္က ခလုပ္(၂)ခုမွာ ဘယ္ဘက္ကခလုပ္ကိုႏွိပ္ပါ။အဆင့္(၄)ဆင့္သူ႔ဟာသူသြားပါမယ္။ အဆင့္(၂)မွာ ရပ္ၿပီး Root ေမးရင္ ညာေအာက္ေဒါင့္ခလုပ္ကို ႏွိပ္ပါ။အဆင္မေျပရင္ အဆင့္(၂)မွာအနီေရာင္ျပၿပီးရပ္ပါတယ္။ ေျပရင္ဆက္သြားၿပီး ဖုန္း restart (၂/၃)ႀကိမ္ေလာက္က်ပါတယ္။
(6) ဖုန္းျပန္တက္လာရင္ Superuser ေလးေတြ႔ရင္ Root access ရပါၿပီး။
ကၽြန္ေတာ္ SIII, Huawei, China Android, Thai Android ေတာ္ေတာ္မ်ားမ်ား စမ္းသပ္ၿပီးပါၿပီ။

Download Links:

Android PC Suite with Root Tool (ZhuoDaShi)

Android Phone မ်ားကို Root လုပ္ႏိုင္ၿပီး PC Suite လိုအသံုး၀င္တဲ့ China PC Suite ေလးပါ။ Computer မွာ Install လုပ္ၿပီးအသံုးျပဳရံုပါပဲ။ Root လုပ္ခ်င္ရင္ေတာ့ Setting ကိုႏွိပ္ၿပီး Root ကိုႏွိပ္ပါ။ Tools ေတာ္ေတာ္မ်ားမ်ားရွိပါတယ္။ Unroot လည္းရပါတယ္။ PC ကို Internet ခ်ိတ္ၿပီး Root ရင္ပိုေကာင္းပါတယ္။ ေတာ္ေတာ္မ်ားမ်ား Root ႏိုင္ပါတယ္။ စမ္းသံုးၾကည့္ပါ။ လိုခ်င္ရင္


Download Links:

Huawei ဖုန္း ၁၈လုံး Recovery သြင္းလုိ႕ ရမဲ႕ All In One Custom Recovery Tool Kit


ဒါေလးကေတာ့ Huawei ဖုန္းေတြအတြက္ CWM Recovery သြင္းဖုိ႕ အတြက္ျဖစ္ပါတယ္……ဒီ Tool Kit မွာပါတဲ့ ဖုန္းေတြကေတာ့ 1. U8825D  2. C8825D

3. U8950D

4. C8950D

5. U9200

6. T9200

7. U8500

8. U8661

9. U8660

10. C8650

11. C8800

12. U8800

13. U8800Pro

14. U9500

15. U8815

16. U8818

17. C8810

18. C8812

အေပၚမွာပါတဲ့ 18 လုံးကုိ CWM Recovery သြင္းႏုိင္မွာပါ…..


အရင္သြင္းက်ျဖစ္တဲ့အတုိင္း Fastboot mode ကေန သြင္းရမွာပါ….Fastboot Mode ဆုိတဲ့ Huawei Logo မွာ ရပ္ေနတဲ့ အခါ ၾကဳိးထုိးျပီး All In One Huawei Recovey ကုိ Run လုိက္ပါ….Zero ကုိ ႏွိပ္ျပီး Enter ေခါက္လုိက္ရင္ေတာ့ကၽႊန္ေတာ္ရဲ႕ Website ကုိ ေရာက္မွာပါ…..ကုိ္ယ့္ဖုန္းအမ်ိဳးအစားကုိ ေရြးျပီး Enter ဆက္တုိက္ေခါက္ရုံပါပဲ……ဖုန္းအမ်ိဳးအစားမွာေရြးမိလဲ ျပသာနာမရွိပါဘူး….. ဘာ Error မွမရွိပါဘူး ဖုန္းဟာ Reboot က်သြားရင့္ေတာ့ Recovery ကုိ ၀င္လုိ႕ရပါျပီ.. ဖုန္းတစ္လုံးနဲ႕တစ္လုံး Fastboot mode Key နဲ႕ Recovery Key မတူလုိ႕ မရွင္းေတာ့ပါဘူး…..

Download Here

Credit to သစ္ဆန္းခန္႔

Wednesday, April 17, 2013

Facebook Home ထည့္ၿပီး Jelly 4.1.2 မွာ ျမန္မာမျမင္ရရင္...

မေန႕ညကေတာ့ Facebook Home ေလးကို တင္လို႕ ရမဲ့နည္းလမ္းေလးကို ျပန္လည္ေ၀မွ်ေပးၿပီးပါၿပီ။ တင္ၿပီးေတာ့ ဘာျဖစ္လဲဆိုေတာ့ 4.1.2 Jelly ဆို Facebook Home မွာ သူငယ္ခ်င္းမ်ားတင္တဲ့ ပို႕ေတြက ျမန္မာလိုေတြ မေပၚပဲ ျဖစ္ေနပါတယ္။ ကၽြန္ေတာ္လည္း Setting ေတြထဲ ဘာျပင္ရမလဲဆိုတာ ေရွာက္ၾကည့္ၿပီး ရွာပါတယ္ မေတြ႕ပါဘူး ဒါနဲ႕ Font Installer ေလး ထည့္ၾကည္႔လိုက္ေတာ့ ျမန္မာစာအဆင္ေျပသြားပါတယ္။
အဲဒီအဆင္ေျပသြားတဲ့ installer ေလးကိုေအာက္မွာတင္ေပးထားပါတယ္ခင္ဗ်ာ။ ေနာက္ကိုလည္း ဒီထက္ပိုအဆင္ေျပေစမဲ့ installer ေလးကို ကၽြန္ေတာ့ဆရာ ေရးေနပါတယ္ မၾကာမီွၿပီးေတာ့ပါမယ္ ကၽြန္ေတာ္ရတာနဲ႕ ျပန္လည္မွ်ေ၀ေပးမွာျဖစ္ပါတယ္ခင္ဗ်ာ။ ခုေတာ့ ဒါေလးပဲ သံုးလိုက္ၾကအံုးေနာ္..
ျမန္မာစာရေၾကာင္း ေအာက္က ပံုေလးေတြ ကိုၾကည့္လုိက္ပါ။


အဲေလာက္ေလးနဲ႕ပဲ သူငယ္ခ်င္းအားလံုးအဆင္ေျပၾကပါေစခင္ဗ်ာ။
>> Download <<

Galaxy S3 mini အတြက္ကေတာ့ ေအာက္က Font Changer ေလးနဲ႕မွ အဆင္ေျပသြားပါတယ္ခင္ဗ်ာ။

>> Download << 
 

Chin Tablet နဲ႕ Phone ေတာ္ေတာ္မ်ားမ်ားကို Root လုပ္ေပးႏိုင္မဲ့ Tool ေလးပါ

ခုေဖာ္ျပေပးတဲ့ Root Tool ေလးကေတာ့ အရင္တုန္းကလည္းတင္ေပးဘူးပါတယ္ခင္ဗ်ာ ခုဗားရွင္းအသစ္ကေလးေတြ႕လို႕ ထပ္ၿပီးတင္ေပးလိုက္တာျဖစ္ပါတယ္။ သူငယ္ခ်င္းအားလံုး အထဲမွာပါတဲ့ Function ေတြအားလံုးကို အသံုးျပဳဖို႕ အတြက္ google မွာ ပံုရွာရင္းနဲ႕ english လို ဘာသာျပန္ေပးထားတာေတြ႕လို႕ ျပန္လည္ေ၀မွ်ေပးလိုက္ပါတယ္ ။ ဘာသာျပန္ေပးထားတဲ့ အကို ကိုလည္း အထူးေက်းဇူးတင္ပါတယ္ခင္ဗ်ာ။ အစတုန္းက တရုတ္လိုႀကီး ပဲ ဆိုေတာ့ တရုတ္လို နားမလည္တဲ့သူေတြ အဆင္မေျပၾကဘူးေလ ခုေတာ့ သူငယ္ခ်င္းအားလံုးအဆင္ေျပသြားတာေပါ့ခင္ဗ်ာ ။ အားလံုးပဲ အဆင္ေျပမယ္လို႕ ေမွ်ာ္လင့္ပါတယ္။

 Root အတြက္ကေတာ့ မိမိတို႕ Root လုပ္မဲ့ အမ်ိဳးအစားရဲ႕ သက္ဆိုင္ရာ Driver တင္ထားဖို႕လိုပါတယ္ အားလံုးျပည့္စံုတယ္ဆိုရင္ေတာ့ Unknow Sources နဲ႕ Usb Debug  on ၿပီးကြန္ပ်ဴတာနဲ႕ခ်ိတ္ပါ။ ၿပီးသြားရင္ေတာ့  Tools ကိုသြားပါ။ ေရာက္ၿပီးဆိုရင္ေတာ့ စက္ရုပ္ပံု # ပါတာေလးကို ႏွိပ္ၿပီး root ႏိုင္ပါၿပီခင္ဗ်ာ။
  သူငယ္ခ်င္းလားလံုး အဆင္ေျပမယ္လို႕ ေမွ်ာ္လင့္ပါတယ္ခင္ဗ်ာ။ ေအာက္မွာေဒါငး္ယူႏိုင္ပါတယ္။

Tuesday, April 16, 2013

Root_with_restore_by_bin4ry_v26 (Lastet Version)


ဒီ Root ေလးကေတာ့ ခုေနာက္ဆံုး ဖန္တီးလိုက္တဲ့ bat ဖိုင္ေလးပါ။ Sony Xperia Z, Xperia V jellybean ေတြ အထိရပါတယ္။ အသံုးျပဳပံုေလးကလည္းလြယ္မွလြယ္ပါ။ ေဒါင္းလုပ္ လုပ္ၿပီးရလာေသာဖိုင္ကို ျဖည္ၿပီး အထဲမွာပါတဲ့ bat ဖိုင္ေလးကို run ေပးၿပီး 1,2,3 ဆိုတာေလး ကို မိမိနဲ႕ ကိုက္ညီမဲ့ နံပါတ္ေလး ေရြးၿပီး enter ႏွိပ္ရံုပါပဲခင္ဗ်ာ။


1 - ကေတာ့ အျခားေသာဖုန္းအမ်ိဳးအစားေတြနဲ႕ sony Old firmware ေတြ အတြက္ပါ။

2 - ကေတာ့ sony tablet ေတြအတြက္ပါ။

3 - ကေတာ့ jellybean firmware ေတြ အတြက္ပါ Xperia z, Xperia V တို႕လို ဖုန္းမ်ိဳးေတြပါ။ အဲေလာက္ဆိုသူငယ္ခ်င္းအားလံုးအဆင္ေျပၾကမယ္ထင္ပါတယ္။ xda က တိုက္ရိုက္ေဒါင္းလုပ္ဆြဲရင္လည္းရပါတယ္ခင္ဗ်ာ။ upload.net ကေနတင္ေပးထားတာျဖစ္တဲ့အတြက္ ေဒါင္းဖို႕ အခက္အခဲရွိပါတယ္။ အားလံုးအဆင္ေျပေအာင္ ျပန္လည္ၿပီး တင္ေပးထားပါတယ္ခင္ဗ်ာ။


>> Download <<

Playstore ကုိ Computer ကေန Download လုပ္မယ္

တင္ေပးမလုိ႔လုပ္ေနတာၾကာပါၿပီ။ပုံေတြလုပ္ရမွာပ်င္းေနတာနဲ႔မတင္ျဖစ္တာပါ။
အားလုံးအလြယ္တကူပဲအသုံးျပဳႏုိင္မွာပါ။စလုိက္ရေအာင္
ကဲလုိတဲ့ File ေလးေတြစဆြဲလုိက္ရေအာင္။
http://www.mediafire.com/download.php?5wfcb6bcbrka5yc(Chrome Version 23.**** အထက္ဆုိရင္လည္းအလုပ္လုပ္ပါတယ္)
http://www.mediafire.com/download.php?6qjcpipm3dd0uq4(ဒါကေတာ့ေနာက္ဆုံးထြက္တဲ့ APK download လုပ္ဖုိ႔ Extension ေလပါ)
http://www.mediafire.com/download.php?y3rcs33i7zmqlcm( Device ID Number စစ္တဲ့ APK ေလးပါ)

1. Chrom Browser မရွိတဲ့သူေတြ Install လုပ္ပါ။ ၿပီးရင္ေတာ့ ပုံမွာျပထားတဲ့အတုိင္း Tools>Extenstion ကုိဖြင့္ပါ။

2. Extension page ပြင့္လာရင္ေတာ့ apk-downloader-1.4.2 ကုိ Drag ဆြဲၿပီးထည့္လုိက္ရုံပါပဲ။


3. Confirmaton box က်လာပါလိမ့္မယ့္ Add ကုိႏွိပ္ေပးပါ။

၄.ဒါဆုိရင္ extension ကုိ install လုပ္ၿပီးသြားပါၿပီး။ မိမိရဲ gamil နဲ႔ Device iD ထည့္ဖုိ႔အတြက္  Apk DOwnload Extension ရဲ႕ option ကုိႏွိပ္ပါ။

5. gamil နဲ႔ Device iD ထည့္ဖုိ႔အတြက္ box ေပၚလာပါလိမ့္မယ္။Device ID APK ကုိ install လုပ္ၿပီး
 စစ္လည္းရပါတယ္။ Diapad ကေန iD ကုိ *#*#8255*#*# ႏွိပ္ၿပီးစစ္လည္းရပါတယ္။ျပည့္စုံရင္ Login ၀င္ပါ။

6. Login ၀င္လုိ႔ရသြားၿပီးဆုိရင္ေတာ့ https://play.google.com ကုိသြား ကုိလုိခ်င္တဲ့ Free app တစ္ခုကုိဖြင့္လုိက္ပါ။
   app ရဲ႕Page ေပၚလာၿပီးဆုိရင္။
   Address bar ညာဘက္အစြန္မွာေပၚတဲ့ Market Icons ေလးကုိ ႏွိပ္ၿပီး Computer နဲ႔ Download လုပ္ယုံပါပဲ။ ပုံလဲတင္ေပးထားပါတယ္။


ကဲဒါဆုိရင္ေတာ့ အားလုံးအဆင္ေျပလိမ့္မယ္လုိ႔ထင္ပါတယ္။

မူရင္ Link ေတြကုိေလ့လာခ်င္ရင္ ဒီမွာပါ
http://apps.evozi.com/apk-downloader/
http://forum.xda-developers.com/showthread.php?t=1809458

မူရင္းလင့္http://blog.myanmarmobileusers.com/

WiFi Pass Recovery & Backup v3.7 Apk 888KB Direct Downlod


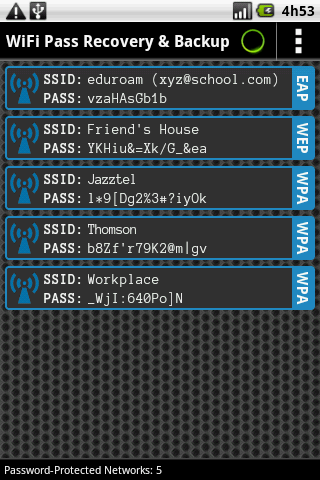
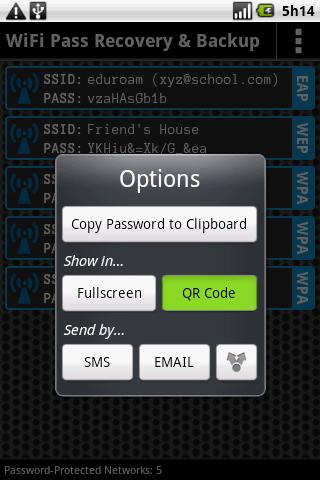
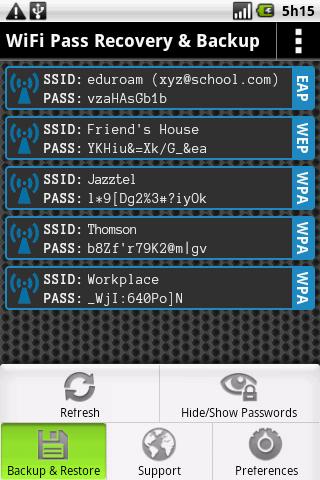
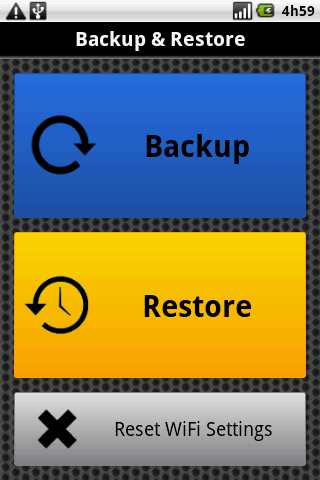
Android ဖုန္း/Tablet အသုံးျပဳသူေတြအတြက္ ၂၀၁၃ ဧျပီလ ၅ ရက္ေန႕မွာထြက္ရွိလာတဲ့ WiFi Pass Recovery & Backup v3.7 for Android ကုိတင္ေပးလုိက္ပါတယ္။ အင္တာနက္ဆုိင္ ၊ လက္ဖက္ရည္ဆုိင္မွာပဲျဖစ္ျဖစ္ ၊ အမ်ားသုံးကြန္၇က္တစ္ခုခုမွာပဲျဖစ္ျဖစ္ wifi သုံးခ်င္ရင္ ဆုိင္ကလူက ကုိယ့္ရဲ႕ဖုန္းမွာ သူကုိယ္တုိင္ password ရုိက္ေပးတာေၾကာင့္ မိမိသုံးေနတဲ့ wifi ရဲ႕ password ကဘာလဲဆိုတာ မသိရတတ္ပါဘူး ။ အဲဒီလုိ password မသိဘူးဆုိရင္ အခုေပးမယ့္ ေဆာ့၀ဲေလးကုိသုံးျပီး ကုိယ့္ဖုန္းထဲမွာသုံးေနတဲ့ ၊ သုံးခဲ့တဲ့ wifi ကြန္ရက္ေတြရဲ႕ password ေတြကုိသိရွိနုိင္ပါတယ္။ ကုိယ္သုံးထားတဲ့ Wifi Network ေတြရဲ႕ password ေတြကုိ ဖုန္းထဲမွာ save ထားလုိ႕လည္းရပါေသးတယ္။ Wifi Pass Recovery ေဆာ့၀ဲကုိအသုံးျပဳဖုိ႕အတြက္ ဖုန္းက Root လုပ္ထားဖုိ႕ေတာ့လုိအပ္ပါတယ္ (Root Access Required) ။ ေတာ္ေတာ္အသုံး၀င္တဲ့ Android application ေလးျဖစ္တာေၾကာင့္ အားလုံးၾကိဳက္ႏွစ္သက္ၾကမယ္လုိ႕ထင္ပါတယ္။ 


မွာေလ့လာျပီးၾကိဳက္ရင္ေအာက္ကလိပ္စာမွာရယူနုိင္ပါတယ္
Ref>>> ျမန္မာမိုဘုိင္း


CyberLink PowerDirector 11 Ultra 11.0.0.2707 Full Version


KoZaw:  ကၽြန္ေတာ္ CyberLink Power Director 11 Ultimate Suite ရဲ႕ Activate key (or) Keygen (or) Crack တစ္ခုခုေလာက္လိုခ်င္ပါတယ္။ 30 Day Trial က ကုန္ေတာ့မွာမို႔လို႔ပါ။ ကူညီပါအုံး။
Keygen,Crack သက္သက္ တင္မေပးႏိုင္တာ ခြင့္လႊတ္ပါ...  တျခားမရွိေသးတဲ႔ သူငယ္ခ်င္းေတြအားလံုးလဲ အဆင္ေျပေအာင္ တဆင့္ျပန္ Share ေပးလိုက္ပါတယ္...။ CyberLink Power Director ကို အားလံုး သိၾကမွာပါ.. Video ေတြတည္းျဖတ္ဖို႔အတြက္ပါ...။
NEW! Content-Aware Editing - PowerDirector 11’s Content-Aware Editing provides a revolutionary way to edit video projects. The advanced built-in technology magically analyzes major scenes, such as those with faces, motion, zoom or pan, and hones in on imperfections that can be improved using TrueTheater®, such as poor lighting, and shakiness. Editing videos is now easier, faster and more efficient than ever.

Analyze entire footage using Content-Aware Editing - Save time tackling hours of footage. Content-Aware Editing quickly and efficiently pinpoints the best scenes automatically.


Intelligently identify the best and imperfect shots - Automatically finds the best scenes with faces, zoom, pan and motion and pinpoints scenes requiring enhancements.

Enhance imperfect shots with TrueTheater® - Corrects all imperfect parts of the entire footage, such as poor lighting and shaky videos using TrueTheater Technology.

Edit Analyzed Footages All at Once - Gather enhanced footage into the timeline of Content-Aware Editing control panel, for additional "across-the-board" editing in one go.

Quality Beyond HD - 4K Video Support - PowerDirector 11 is the first and only consumer video editing software to support end-to-end editing of 4K ultra HD video format. Supports import of 4K videos from the latest camera devices, edit more efficiently with TrueVelocity and produce breathtaking 4K movies on disc or publish online right from your desktop.

NEW! Full HD Preview - Undock the preview window and bring a full HD preview window in second monitor, for a better, close-up view of every detail.

NEW! Ripple Editing - With new ripple editing, you can easily insert or remove video clips on the timeline while keeping all other items on the track aligned.

NEW! Customizable Hotkey - Further speed up your video editing skills with several sets of hotkeys to instantly perform commands—even customize your own hotkeys.

100-Track Timeline - Set your creativity free with the 100-track timeline. Overlay footage, PiP objects, titles and particles to design unique visual effects.

NEW! Design Studio - Need more tools to help make your production look unique? PowerDirector 11's new Design Studio tools come with four new designer tools: Title Designer, PiP Designer, Particle Designer and Menu Designer. You can use the full screen editing interface and timeline for a more accurate animation design, or overlay particle effects over titles. Apply reflection effects to title text or PiP objects, or use the 4-color gradient to make your title text really stand out.

NEW! Title Designer - Create unique, professional-looking titles for just the right finishing touches to your video with 4-color gradients, reflections, or edit the entry points using the timeline.

NEW! Particle Designer - Includes a built-in particle object library that you can use to design its animation and control the frequency. Create sparkle, fairy dust, rain or snow overlays to your videos.

NEW! Menu Designer - Produce your movies with a self- made disc menu. You can design menus with titles, chapters, particles and PiP objects with your own unique flair.

Magic Movies in Minutes! - Magic movie tools provides you the easiest and automated way to edit your videos Simple select the videos and photos you want to use in your creation, Magic Movie tool will automatically add stylish templates, transitions and music, then complete your video within minutes!

Precise Keyframe - Edit effects within a single interface for easy timing and synchronization each effect to take place on the video timeline. A must-have tool to create unique visual effects.

Precise Trim Tool - Together with auto scene detection, PowerDirector provides an easy way to trim videos efficiently. Also supports multi-trim and zoom-in video for more granular control tools.

Time-lapse & Slideshow Creator - Create amazing time-lapse or stop motion videos. Also includes complete tools to customize photo slideshows with animations and background music.

Chroma-Key Tool - Take videos in front of a green sheet or blue sheet and merge with other videos to create special effects like they do in weather broadcasts or Hollywood movies.

Integrated NewBlueFX Effects - Take your editing up a notch with 10 built-in video effects from NewBlueFX. World class effect options help you create masterpiece video productions.

Hand-Paint Animation - Design your own hand-drawn artwork using an array of brushes, then record them or apply distortion effects and action speeds before integrating into your video projects.

3D Videos From Start to Finish - Import, edit and export videos and photos all in 3D! With support for all major 3D video and photo formats, you can produce 3D movies to watch on 3D TV and displays.

TrueTheater® HD - Upscale videos captured from your SD camcorders to HD-like quality with CyberLink’s TrueTheater® HD technology.

TrueTheater® Stabilizer - TrueTheater® Stabilizer technology automatically fixes shakiness for footages taken from a handheld camcorder.

TrueTheater® Lighting - TrueTheater® Lighting enhances light issues in your footage, such as. white balance and backlight problems.

TrueTheater® De-noise - Use TrueTheater® De-noise to eliminate video noise, such as for night shots, to produce clean, smooth visuals.

AVCHD 2.0 and Enhanced De-interlace - PowerDirector 11 is the world’s first video editor certified for both AVCHD 2.0 3D and 50/60p progressive profiles. PowerDirector 11 also enhanced video de-interlacing engine with sub-pixel level processing produces, greatly improved video quality output especially in fast motion and zoomed-in scenes. You can now use PowerDirector to produce DVDs, Blu-ray and AVCHD discs or video files with the best quality.

4K, HD and 3D Movies - Produce movies in 4K ultra HD resolution or even 3D to watch and enjoy on large screens for the ultimate entertainment to share with friends and family.

Pro Quality Surround Sound - Create pro-quality videos with clear Dolby Digital and DTS 5.1 channel surround sound for a cinema-style movie production.

New Formats Support - PowerDirector 11 supports several new formats to fulfill your need of new generation HD video and multi-channel audio. You can now import MKV video files with multi-soundtracks, or produce your video in MKV format, in up to 4K quality. PowerDirector 11 also supports the latest AVCHD 2.0 format, with extensive 60p video and 3D support.

What is new in build 2321 (November 30, 2012)

Updates
- Adds support for Holiday Pack vol. 4.
- Improves program stability when using Magic Style or Magic Cut on 50 or 60 FPS videos.
- Adds support for PowerDirector Mobile projects.
- Adds support for NVIDIA GTX 600 series hardware encoding.
- Adds the MPEG-4 Full HD production profile for iPhone 5/4S.
- Adds support for NicoNico Douga in Traditional Chinese and English.
- Adds the "Add New Keyframe" and "Remove All Keyframes"options in the context menu of the PiP Designer.
- Adds the "Duplicate Previous Keyframe" and "Duplicate Next Key frame" options in the context menu of the Particle Designer.

Improvements
- Corrects the video duration of the resulting Magic Movie created movie.
- Improves MPEG-2 video encoder quality.
- Improves compatibility with NVIDIA display driver version 30X.XX.
- Improves H.264 video bitrate upper bound to 200 Mbps for 4K resolution

Recommended System Requirements
Operating Systems
Microsoft Windows® 8, 7, Vista or XP (Service Pack 3).

Screen Resolution
1024 x 768, 16-bit color or above

CPU Processor
* PowerDirector 11 is optimized for CPUs with MMX/SSE/SSE2/3DNow!/3DNow! Extension/HyperThreading technology.
* AVI Capture/Produce: Profiles: Pentium 4 3.0 Ghz or AMD Athlon 64 X2
* DVD Quality (MPEG-2) Profiles: Pentium 4 3.0 Ghz or AMD Athlon 64 X2
* High Quality MPEG-4 and Streaming WMV, QuickTime) Profiles: Pentium 4 3.0 Ghz or AMD Athlon 64 X2
* Full-HD quality H.264 and MPEG2 Profiles: Intel Corei5/7 or AMD Phenom II X4
* AVCHD and BD burning Profiles: Pentium Core 2 Duo E6400, or AMD Phenom II X2
* 2K/4K/3D* video editing profile: Intel Corei7 or AMD Phenom II X4 with 64 bit OS 6 GB RAM

Languages : English, French, German, Italian, Spanish, Chinese (Traditional), Chinese (Simplified), Chinese (Simplified Singapore), Japanese, Korean, Dutch, Russian, Polish, Portuguese (Brazil), Portuguese (Portugal).


Download CyberLink Power Director 11 Ultimate Suite


Download CyberLink PowerDirector 11 Ultra

(or)


Download CyberLink PowerDirector 11 Ultra
(or) 
Click Here to Download
   

  လမင္းတိမ္လႊာ:
Full Version ျဖစ္ေအာင္ Key ကုိဘယ္လုိထည့္ရမလဲဆုိတာေျပာျပပါဦးဗ်ာမလုပ္တတ္လုိ႔ပါ....။
ဝင္းကမာၻေက်ာ္   from


 How to Make Full Version...


Windows 8 Key Activator Loader Patch 2013 and Pro Activator v1.0 (6MB)


၀င္းဒုိး 8 အသံုးျပဳတဲ့ သူငယ္ခ်င္းေတြအတြက္ 

လိုင္စင္ အဆင္မေျပျဖစ္ခဲ့ရင္စမ္းၾကည့္နုိ္င္ပါတယ္ 

အသံုးျပဳမယ္ဆို ေအာက္ကလိပ္စာမွာရယူနုိင္ပါတယ္ 
အမ်ိဳးေကာင္းသားမွ

Download>>>mirrorupload (or).zippyshare (or)sharebeast

Screencast Video Recorder v3.2a Apk 3MB Direct Downlod


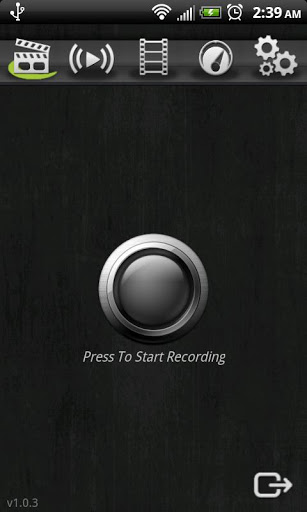
ဖုန္းေတြမွာ  Video Recorder လုပ္ခ်င္တဲ့ သူငယ္ခ်င္းေတြအတြက္ အဆင္ေျပမယ့္ App ပါ

Screencast Video Recorder ေဆာ့၀ဲကုိအသုံးျပဳဖုိ႕အတြက္ 

ဖုန္းက Root လုပ္ထားဖုိ႕ေတာ့လုိအပ္ပါတယ္ (Root Access Required)


မွာေလ့လာျပိး ၾကိက္ရင္ ေအာက္ကလိပ္စာမွာရယူနုိင္ပါတယ္ 


အမ်ိဳးေကာင္းသားမွ ကူးယူေဖာ္ျပ

Sidebar Pro v4.2.1.0 Apk (332.67 Kb) အမ်ိဳးေကာင္းသားမွ


Sidebar Proအသံုးျပဳတဲ့ သူငယ္ခ်င္းေတြအတြက္ Update တင္ေပးလိုက္ပါတယ္
တစ္ခါတစ္ေလ မိမိတုိ႕ အသုံးျပဳ ေနတဲ့ ေနရာကေန  ဖုန္းဆက္ခ်င္တာပဲျဖစ္ျဖစ္..message ပုိ႕ခ်င္တာပဲျဖစ္ျဖစ္ တစ္ခုခုကုိလုပ္ခ်င္တဲ့အခါ back key နဲ႕ သြားရတာေၾကာင့္ နည္းနည္းအဆင္မေျပႏုိင္တာကုိ ေတြ႕ရွိေနရပါတယ္… ဒီေဆာ့၀ဲလ္ေလးက အဲဒီ အခက္အခဲကုိ ေျဖရွင္းေပးမွာ ျဖစ္ပါတယ္….
မွာေလ့လာျပီး အသံုးျပဳမယ္ဆိုေအာက္လိပ္စာမွာရယူနုိင္ပါတယ္


China Clone Android version 4.1.1 Phone ေတြကို Root လုပ္နည္း


khinmghtwe: Chinese Clone Phone ေတြကို ဘာနဲ ့ Root ခ်လို ့ရႏုိင္လဲ Driver ရွာမေတြ႕ပါခင္ဗ်ာ...

China Clone  Android version 4.1.1  phone ေတြကို root လုပ္ခ်င္တဲ့ သူငယ္ခ်င္းေတြ အတြက္
ဒီပို ့ကို အလုပ္မအားတဲ့ ၾကားကေန တင္ေပးလိုက္ပါတယ္... အခုတစ္ေလာ ကၽြန္ေတာ္ အလုပ္ေတြရွဳပ္ေနလို ့
blog ဘက္ကို လွည့္မၾကည့္ႏိုင္တာပါ   ထိုင္းေရာက္Itလူငယ္မ်ားအဖြဲ ့
ထဲက member တစ္ေယာက္ရဲ့ ဖုန္းကို ကၽြန္ေတာ္ ကိုယ္တိုင္ လက္တည့္စမ္ေပးထားတာပါ
root လုပ္မဲ့ ေဘာဒါမ်ား အရင္ဆံုးလိုအပ္တဲ့ ဖိုင္လ္ကို ေအာက္ကေနေဒါင္းလိုက္ပါ..။

 Clone Android  Root ဖိုင္ကိုေဒါင္းရန္ 

ေဒါင္လို ့ရတဲ့ zip ဖိုင္ကိုျဖည္လိုက္ပါ အထဲမွာ root ဖိုင္ရယ္ driver ရယ္ရွိပါတယ္
root လုပ္မဲ့ ဖုန္းမွာ အရင္ဆံုး Settings > Develper > usb ေနရာေတြကို အမွတ္လိုက္ျခစ္ေပးလိုက္ပါ
ၿပီးရင္ ဖုန္းကို computer နဲခ်ိတ္လိုက္ရင္ driver ေတာင္းလာပါမယ္ ဒါဆို ေပးထားတဲ့ driver ဖိုင္ကို
သြင္းေပးလိုက္ပါ driver သြင္းၿပီလို ့ ေအာင္ျမင္တယ္ဆိုရင္ root လုပ္ဖို ့ မခက္ခဲေတာ့ပါဘူး..

root လုပ္ဖို ့အတြက္ root ဖိုင္ကိုဖြင့္လိုက္ပါ အထဲက Run Me ေနရာမွာႏိွပ္ပါ
အမဲေရာင္ CMD အကြက္တက္လာပါမယ္ အကြက္ထဲက 1 Mornal ေနရာကိုႏိွပ္ၿပီ root မွာျဖစ္တဲ့အတြက္
ကြန္ပ်ဴတာ ကီးဘုတ္က 1 ကိုႏွိပ္ၿပီ enter ႏိွပ္ပါ ဒါဆို CDM အကြက္ထဲက အစိမ္းေရာင္စာတန္း Running....
ေပၚလာရင္ ဖုန္းမွာသြားၾကည့္ပါ ( Do Not Restore & Restore My date ) စာတန္းတက္လာပါမယ္
ဒါဆို Restore My date စာတန္းကိုေရြးၿပီး  enter ဆက္ႏိွပ္ပါ  CDM အကြက္က ေနာက္ထပ္စာတန္း
reboot your device 10 seconds .... စာတန္းတက္လာရင္ ဖုန္းကိုပါဝါအျမန္ပိတ္ေပးလိုက္ပါ ၿပီးရင္ခ်က္ခ်င္း
ပါဝါျပန္ဖြင့္ေပးလိုက္ပါ CDM ကအလုပ္ဆက္လုပ္သြားပါလိမ့္မယ္ စာတန္းတက္လာၿပီး ရပ္ေနရင္ enter ကိုဘဲႏိွပ္ေပးပါ ေနာက္ဆံု CDM အကြက္ပိတ္ၿပီ ဖုန္း reboot က်ၿပီး ျပန္တက္လာရင္ Superuser app
ေရာက္ေနပါၿပီ အားလံုးအဆင္ေျပပါေစ...။


Post by : SmartGhost


 Credit to:http://thaiinmyanmarit.blogspot.com

Friday, April 12, 2013

Flash Tool အသုံးျပဳ႕နည္း KoThiha


သိတဲ့လူေတြအတြက္ အရမ္းထူးဆန္းတာမဟုတ္ေပမယ့္ အသံုးမျပဳ႕ဖူးေသးတဲ့လူေတြအတြက္ေတာ့ အရမ္းအသံုးဝင္ပါတယ္ COA က  Hay tu ေခၚ ကိုသီဟ ေရးထားတာေလးကို ျပန္လည္မွ်ေဝလိုက္တာပါ
အသံုးမျပဳ႕ဖူးေသးတဲ့ လူေတြကေတာ့ ဒီဟာေလးကို ေအာက္မွာေဒါင္းၿပီးဖတ္လိုက္ပါ


ကိုလတ္(ကြ်ဲဆင္း)

Sony Xperia : S, T, P , Acro S, Ion , Tipo , Tablet S, Go, Sola, U, Z, ZL နဲ႔ဖုန္းမ်ိဳးစံုကို Root ႏိုင္တဲ့ Root with Restore by Bin4ry v26 (Latest Version)


Root_with_Restore_by_Bin4ry က Version တဆင့္ၿပီးတဆင့္ျမင့္လာပါတယ္။ ခု Version 26 ေရာက္ပါၿပီ။ Sony ေတာ္ေတာ္မ်ားမ်ားကို Root ႏိုင္ပါတယ္။ အျခားဖုန္းေတာ္ေတာ္မ်ားမ်ားလည္း ရတယ္။ လုပ္နည္းကလည္း လြယ္မွလြယ္။ အရင္လည္း Version 14,18 နဲ႔ 21 ကိုဒီ Blog မွာတင္ဘူးပါတယ္။ လုပ္နည္းလည္း ပါပါတယ္။ ဘယ္ဖုန္းကိုမဆို စမ္းၿပီး Root ၾကည့္ပါ။

အႏၱရာယ္မရွိပါဘူး။ ဖုန္းမွာ USB Debugging နဲ႔ Unknown Source ကို အမွန္ျခစ္ထားၿပီး Computer မွာတပ္ပါ။ လုပ္နည္းက-
How-To:
1.) Download attached file. (Download ဆြဲပါ)
2.) Extract it using 7zip (Unzip လုပ္ပါ)
3.) Double click the RunMe.bat and follow instructions! (RunMeBat ကိုဖြင့္ၿပီး ညႊန္ၾကားခ်က္ အတိုင္းဆက္လုပ္ပါ။)
Xperia phones = Normal mode
Sony Tablet and similar = Special mode
Confirmed devices:
-Sony Xperia : S, T, P , Acro S, Ion , Tipo , Tablet S, Go, Sola, U, Z, ZL
-Google: Nexus 7 [UK Firmware] (thanks Paul O'Brien for test) [seems some firmwares to work and some don't, as i dont have this device myself i would appreciate reports with FW-versions]
-XTouch: X401
-Jiayu G2-S thanks txakar
-LG: P705 thanks mariolcneto, P7510 thanks fdothivanka
-HTC: One S thanks sebagsm, Sensation XL [ICS 4.03] thanks Koate via PM, Sprint's OTA -ICS update on Evo3D seems incompatible, Desire S thanks to Krayt via PM
-Kyocera: Rise & Hydro thanks jmztaylor
-Samsung: Galaxy S2 thanks danroobယ Some more
-Ainol: Novo 7 Tornado 7 thanks anoperson
-Prestigio: MultiPad PMP5197D 9.7 ULTRA thanks logofreax
-HDC: I9300 S3 clone thanks PMmshprojects

အဆင္ေျပေျပ တူးႏိုင္ၾကပါေစ..


Download : 8.25 MB